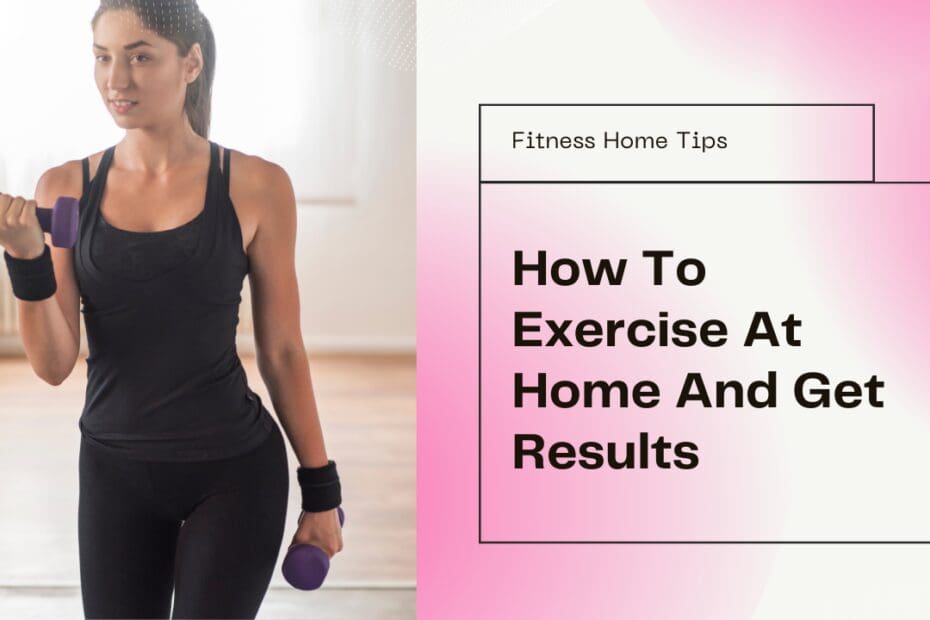
Getting started with exercise can feel overwhelming, especially if you’re new to fitness or trying to create a home-based routine. The great news? You don’t need a gym membership or expensive equipment to begin! This fantastic guide to exercise for beginners at home provides simple and effective ways to build strength, improve energy, and enhance your overall well-being—all from the comfort of your living room. Whether short on time, space, or experience, these beginner-friendly exercises make it easy to fit fitness into your life. Start today and take the first step toward a healthier, more active you!
Stretch to Start the Day
Kickstart your day with exercise for beginners at home by incorporating gentle stretches into your morning routine. Activities like yoga, crunches, or even a few push-ups are perfect for waking up your body and getting your blood flowing. The best part? These simple exercises only take a few minutes, making it easy to fit them in before starting the rest of your day.
Arm Circles
Arm circles are an excellent exercise for beginners at home, offering multiple benefits while being incredibly simple to do. They’re perfect for warming up your shoulder joints, improving your range of motion, and relieving stiffness—especially if you spend a lot of time sitting or working on a computer.
This circular movement primarily targets your shoulder muscles (deltoids) and also engages your biceps and triceps, especially if you incorporate light weights. Additionally, arm circles help boost blood flow to your upper body, easing muscle tension and enhancing flexibility.
As a low-impact and gentle exercise, arm circles are safe for beginners and those with joint concerns. They’re ideal for prepping your body for more intense upper-body workouts or as part of a cool-down routine.
Another bonus? Arm circles strengthen the muscles around your shoulders and upper back, helping to combat poor posture caused by sitting or slouching. In short, they’re a beginner-friendly exercise that enhances mobility, strength, and circulation—all while being easy to do right at home!
How To Do Arm Circles
- Stand up straight with your feet shoulder-width apart and your arms relaxed by your sides.
- Engage your core by pulling your belly button slightly inward.
- Raise your arms to your sides until they’re parallel to the floor, forming a “T” shape with your body. Keep your palms facing down or forward, whichever feels comfortable.
- Begin by moving your arms in small circles forward and maintain a steady, controlled pace.
- Slowly make the circles larger, keeping your arms straight and controlled.
- After 15–20 seconds of forward circles, switch directions and start circling backward. Start with small circles and gradually make them larger.
- Perform 2–3 sets of 15–30 seconds in each direction.
Add light weights like water bottles or small dumbbells if you want a challenge.
Jumping Jacks
Jumping jacks are a fantastic exercise for beginners at home that offer a full-body workout with numerous benefits. They’re excellent for quickly getting your heart rate up, improving heart health, and building endurance. Plus, this simple exercise engages multiple muscle groups, including your legs, arms, and core, giving your entire body a quick and effective workout.
As a calorie-burning powerhouse, jumping jacks are perfect for those aiming to lose weight, as they help burn fat while toning your muscles. The best part? You don’t need any equipment or a gym—just a little space to jump, making them ideal for home workouts.
Beyond fitness, jumping jacks improve coordination, balance, and agility, skills that benefit everyday activities and sports. They also boost your mood by releasing endorphins (feel-good hormones), helping to reduce stress and elevate your energy levels.
Whether you’re using them as a warm-up or squeezing in a quick session, jumping jacks are perfect for getting your blood flowing and prepping your muscles for more activity. Incorporate them into your routine, and you’ll build stamina and fitness, making more challenging workouts feel like a breeze.
How To Do Jumping Jacks
- Stand upright with your feet together, and your arms relaxed at your sides. Keep your back straight and engage your core.
- Bend your knees slightly to get ready to jump.
- Jump up while spreading your legs to the sides (slightly wider than shoulder-width apart). At the same time, lift your arms overhead in a wide arc, clapping or bringing your hands close together at the top.
- Jump again to bring your legs back together and lower your arms to your sides. Land softly with your knees slightly bent to absorb the impact.
- Continue this motion at a steady, rhythmic pace.
- Aim for 10–20 repetitions or 30 seconds to start, then increase as you build stamina.
Modification Options
- Low-Impact Version: Step one foot out to the side and raise your arms overhead, alternating sides instead of jumping.
- Advanced Version: Add light ankle or wrist weights for extra resistance.
Side Leg Raises
Side leg raises are a fantastic exercise for beginners at home that are simple yet highly effective. They target your hip abductors—muscles on the outer thighs and glutes—essential for keeping your hips and legs stable during movement.
By engaging your core and lower body, side leg raises improve balance and stability, helping prevent falls and enhancing athletic performance. They’re excellent for toning and sculpting your outer thighs and glutes, giving you a stronger and more defined lower body.
This exercise also boosts hip mobility, reducing stiffness and discomfort, especially if you spend long hours sitting. Since side leg raises are low-impact, they’re perfect for beginners or those recovering from injuries.
Stronger hips and glutes make everyday tasks like walking, climbing stairs, and standing easier while improving posture and reducing strain on the lower back. Best of all, you can do side leg raises anywhere—at home, at work, or even outdoors. No equipment is required, but adding a resistance band can make them more challenging as you progress.
How To Do Standing Leg Raises
- Stand upright with your feet hip-width apart. Hold onto a sturdy surface, like a wall or chair, for balance if necessary.
- Tighten your abdominal muscles to stabilize your body and protect your lower back. Keep your back straight and avoid arching or leaning.
- Slowly lift one leg out to the side, keeping it straight.
- Slowly lower your leg back to the starting position.
- Complete 10–15 reps on one side, then switch to the other leg. Perform 2–3 sets for each leg, depending on your fitness level.
How To Do Lying Leg Raises
- Lie on a mat or soft surface with your legs stacked on each other. Rest your head on your bottom arm, or prop yourself slightly on your elbow.
- Tighten your abdominal muscles to stabilize your body and protect your lower back. Keep your back straight and avoid arching or leaning.
- Raise your top leg toward the ceiling, keeping your foot flexed or pointed (your choice).
- Slowly lower your leg back to the starting position.
- Complete 10–15 reps on one side, then switch to the other leg. Perform 2–3 sets for each leg, depending on your fitness level.
Optional Modifications
- Add Resistance Bands: Place a resistance band around your thighs or ankles for an extra challenge.
- Use Ankle Weights: Add light weights to increase the intensity.
Chair Dips
Chair dips are an excellent exercise for beginners at home to strengthen your triceps, shoulders, chest, and core. This bodyweight move primarily targets your triceps, helping to tone and build the back of your arms while engaging your shoulders and chest to improve upper-body strength. Additionally, your core muscles activate to keep you stable throughout the movement.
One of the greatest advantages of chair dips is their minimal equipment requirement—all you need is a sturdy chair or surface. They’re versatile, easy to include in any fitness routine, and adjustable for different fitness levels. Beginners can keep their legs bent for a simpler workout, while those seeking a challenge can straighten their legs to increase intensity.
Beyond aesthetics, chair dips are functional and mimic everyday pushing movements, making them ideal for building practical strength you’ll use in real-life activities. Incorporate chair dips into your routine to enhance your upper-body strength and overall fitness right from the comfort of your home!
How To Do Chair Dips
- Place the chair on a non-slip surface against a wall or stable surface to ensure it doesn’t move.
- Sit on the edge of the chair. Place your hands on the edge of the chair seat, fingers pointing forward, shoulder-width apart.
- Slide your butt off the chair so your hips are just in front of it. Keep your arms straight, but avoid locking your elbows.
- For an easier variation, position your legs bent at a 90-degree angle with your feet flat on the floor. Straighten your legs and place your heels on the floor for a challenge.
- Slowly bend your elbows to lower your body toward the floor. Lower yourself until your upper arms are parallel to the floor or as low as you can comfortably go.
- Press through your palms to straighten your arms and return to the starting position.
- Perform 8-12 reps, or as many as possible, while maintaining good form.
Common Modifications:
- Easier: Keep your legs bent and closer to the chair.
- Harder: Straighten your legs or place your feet on another chair or elevated surface.
Bodyweight Squats
Bodyweight squats are an excellent exercise for beginners at home, offering numerous benefits whether your goal is to get fitter, build strength, or improve overall well-being. They target all the major muscles in your lower body—quads, hamstrings, glutes, and calves—while engaging your core to maintain stability.
The beauty of bodyweight squats is their simplicity. No equipment is required, so you can do them anywhere—at home, in the yard, or wherever you have some space. They’re perfect for improving mobility in your hips, knees, and ankles, which can enhance your posture and everyday movements. Plus, squats stretch and strengthen your muscles simultaneously.
Since squats mimic natural movements like sitting and standing, they’re practical for building real-life strength. While primarily a strength exercise, they also raise your heart rate, helping you burn calories and boost your metabolism.
Performed with proper form, squats strengthen the muscles around your joints, providing extra support and reducing the risk of injury. They’re suitable for all fitness levels, and you can adjust the difficulty by changing the pace, adding pauses, or increasing repetitions. Regular squats can tone your legs and glutes, enhancing your lower-body strength and appearance.
For those considering weighted exercises, bodyweight squats are a fantastic starting point to perfect your form and build a strong foundation before progressing.
How To Do Bodyweight Squats
- Stand with your feet shoulder-width apart or slightly wider. Point your toes slightly outward (about a 10–30 degree angle). Keep your weight evenly distributed across your heels and the balls of your feet.
- Tighten your core muscles to stabilize your spine.
- Push your hips back as if you’re sitting in a chair. Bend your knees while keeping them in line with your toes (don’t let them collapse inward).
- Lower your body until your thighs parallel the floor (or as low as your mobility allows). Keep your heels firmly planted on the ground. Your knees should stay behind or aligned with your toes.
- Hold the bottom position for a second.
- Drive through your heels and squeeze your glutes as you stand back up to return to the starting position. Straighten your legs while slightly bending the knees at the top.
Wall Push-Ups
Wall pushups are a fantastic exercise for beginners at home, offering a simple yet effective way to build strength and improve fitness. They’re perfect if you’re new to strength training or find regular pushups too challenging. This low-impact exercise targets your chest, shoulders, and arms while being gentle on your joints, making it ideal for anyone recovering from an injury or dealing with joint discomfort.
Wall pushups also help you practice proper form—like engaging your core and maintaining a straight body line—before progressing to more advanced pushup variations. They’re a great stepping stone for building the strength needed to tackle traditional pushups.
One of the best things about wall pushups is their convenience. You don’t need any equipment, and you can do them virtually anywhere, whether at home, the office, or while traveling. As you get stronger, you can adjust the difficulty by lowering the angle of your body to make the exercise more challenging.
Wall pushups are quick and easy to fit into your daily routine, even if you only have a few minutes to spare. They’re an excellent way to ease into a fitness routine, build upper body strength, and set the foundation for more advanced exercises down the line.
How To Do Wall Push-Ups
- Stand facing a wall, about 2 feet away from it. The exact distance depends on your arm length and comfort. Place your palms flat on the wall at shoulder height and shoulder width apart. Your fingers should point upward.
- Lean slightly forward so your weight is supported by your hands. Keep your feet flat on the ground and adjust your distance from the wall to feel stable and comfortable.
- Slowly bend your elbows, keeping them close to your body or at about a 45-degree angle (not flared out). Lower your chest toward the wall controlled, stopping just before your nose or chest touches the wall.
- Push through your palms to straighten your arms and return to the starting position. Make sure your movements are smooth and controlled, not jerky or rushed.
- To start, perform 10–15 repetitions, or as many as possible, while maintaining good form. Rest for a moment if needed, and aim for 2–3 sets.
Step-Ups
Step-ups are a fantastic exercise for beginners at home, offering numerous benefits for building strength and improving fitness. They primarily target your glutes, quads, hamstrings, and calves, helping you strengthen these key muscle groups. Since step-ups work one leg at a time, they’re excellent for correcting muscle imbalances and promoting balanced strength.
This exercise is highly practical, mimicking everyday movements like climbing stairs, making it functional for daily activities. It also enhances balance and coordination, essential for maintaining overall stability and mobility.
One of the best things about step-ups is their low-impact nature, making them gentle on your joints while remaining highly effective. To increase the challenge, you can adjust the height of the step, add weights like dumbbells, or pick up the pace to elevate your heart rate for a cardio boost.
Step-ups require minimal equipment—just a sturdy bench, box, or platform—making them easy to incorporate into your at-home workout routine. As an added bonus, step-ups engage your core to stabilize your body, providing extra benefits for your abs and lower back. They’re a versatile and beginner-friendly way to build strength and fitness right at home!
How To Do Step-Ups
- Find a sturdy bench, box, or platform about knee height or slightly lower. Make sure it won’t wobble or move when you step on it. Stand facing the platform with your feet about hip-width apart.
- Keep your back straight, chest up, and shoulders relaxed. Engage your core to help with balance and stability.
- Place your right foot flat on the platform, ensuring your whole foot is stable on the surface. Push through your right heel to lift your body, straightening your right leg. Avoid pushing off with your back foot too much.
- Bring your left foot to the platform so both feet stand on it.
- Step back down with your left foot first, carefully lowering it to the ground.
- Follow with your right foot, returning to the starting position.
- Repeat the movement, alternating legs (right foot up, left foot up).
Optional Variations
- Add weights: Hold dumbbells, a kettlebell, or a barbell to increase the intensity.
- Adjust height: Use a lower or higher platform depending on your fitness level.
- Speed up: Turn it into a cardio workout by performing the step-ups faster.
Starting your fitness journey with exercise for beginners at home has never been easier. These simple and effective exercises can help you build strength, improve flexibility, and enhance your overall health—all without the need for fancy equipment or a gym membership. Consistency is key; progress may take time, but every small step brings you closer to your goals. So, roll out your mat, dedicate a few minutes each day, and take charge of your well-being. Your journey to better health begins now, right at home. If you have a desk, check out these desk exercises! Let’s get moving now!