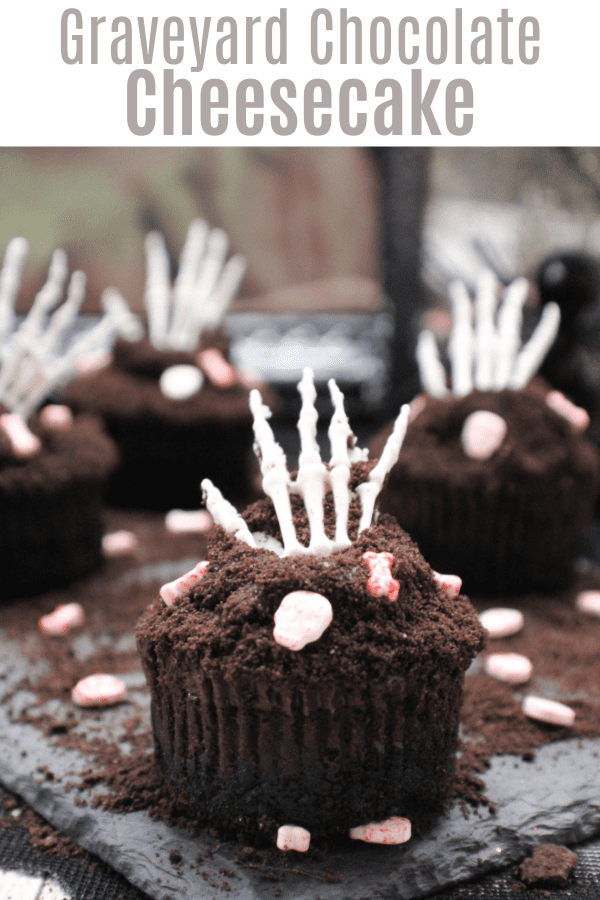
It's time to embark on a culinary journey into the macabre! Let's delve deep into the art of creating a spine-chilling masterpiece: the Scary Graveyard Chocolate Cheesecake. We'll unearth the dark and delicious secrets behind crafting a dessert that tantalizes your taste buds. With intricate details, rich flavors, and a touch of eerie elegance, this dessert is perfect for Halloween gatherings, horror-themed parties, or any occasion where you want to add a dose of delicious fright to your menu. Let's venture into the world of culinary darkness as we uncover the steps to conjure this sinfully scrumptious spectacle.

Graveyard Chocolate Cheesecake
Equipment
- 1 skull hand fondant mold
- 1 fondant dusting brush
Ingredients
Skull hand ingredients
- 1 4 oz white fondant
- 1/4 cup cornstarch
- 1/4 cup vegetable shortening
Crust ingredients
- 1 1/2 cup chocolate graham cracker crumbs
- 2 tbsp sugar
- 1/4 cup unsalted sweet cream butter, melted
Chocolate Cheesecake ingredients
- 2 oz semi-sweet chocolate
- 12 oz cream cheese, softened
- 1/4 cup sugar
- 1 large egg
- 1 tsp pure vanilla extract
Topping ingredients
Instructions
Skull Hand Directions
- Using your hands, rub a teaspoon size amount of vegetable shortening onto your hands, this helps keep the fondant from sticking to your fingers.
- Work 1 tablespoon of fondant until soft and pliable and use your fondant silicone mold,
- Allow the fondant to harden overnight.
Crust directions
- Preheat oven to 350 degrees and line the cupcake pan with white cupcake liners.
- Using a large bowl, whisk together the chocolate graham cracker crumbs and sugar
- Gently mix in the melted butter until a sandlike mixture forms
- Spoon 1 tablespoon into each cupcake liner
- Using a flat bottomed cup, gently press down to make a evenly crust layer
- Bake the crust in the oven for 5 minutes
- Remove and allow to cool completely
Chocolate Cheesecake directions
- Reduce the oven temp to 250 degrees
- Using a large bowl, beat the cream cheese and sugar until combined and smooth
- Beat in the egg until combined
- Beat in the pure vanilla extract until combined
- Spoon about 2 tablespoons of the cheesecake batter into the cupcake liners. Gently tap the pan onto the counter to release any ‘bubbles’ in the batter
- Bake in the oven for 25 minutes or until the center doesn’t jiggle
- Remove from the oven and allow to cool to room temperature before removing and placing on a smaller cookie sheet and place in the fridge overnight
Topping Directions
- Using a small pot, bring the 1?2 c heavy whipping cream to a simmer
- Pour the hot cream over the chocolate chips in a medium bowl and allow to sit for 1 minute before whisking until smooth
- Spoon half into the piping bag and set aside
- Remove the cheesecakes from the fridge and spread about 1-2 tablespoons of ganache on top of the cheesecakes

- Dip into the crushed chocolate graham cracker

- Pipe a thick dollop of ganache in the center of the cheesecake and coat completely in the crushed graham cracker
- Decorate with the fondant skull hand and sprinkles

This dessert is more than just a treat for the taste buds. It's a testament to the artistry and creativity that can be achieved in the kitchen. With each bite, you're transported to a spooky graveyard scene, complete with decadent cheesecake that's sinfully smooth.
The process of creating this masterpiece is a wonderful opportunity to bond with friends and family. Gather your loved ones for a spooky baking session, and let the creative juices flow as you design your skeletons. It's a chance to share laughter, stories, and perhaps even a few spooky tales around the kitchen table. The Scary Graveyard Chocolate Cheesecake is more than just dessert; it's an experience, a conversation starter, and a memory-maker.
So, whether you're preparing for a Halloween bash, a horror movie night, or simply looking to surprise your loved ones with a unique and delectable dessert, remember that the Scary Graveyard Chocolate Cheesecake is your secret weapon. It's the perfect blend of fear and flavor, a culinary masterpiece that will linger in the minds of your guests long after the last bite.


